
Tips for Excel, Word, PowerPoint and Other Applications
Cameras, Copy Picture, Paste Picture Link and more really cool stuff
Why It Matters To You
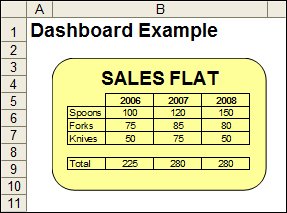
Most people don't realize it, but Excel has the same drawing capabilities as Word and Powerpoint. This means that you can add shapes and colors, like the example to the right, to accent your spreadsheet reports and highlight key results, metrics, or trends. Unfortunately, as we learned in our last article, Fill Colors in the Office Suite, spreadsheet data is typically the background layer (e.g., lowest level) so any drawing objects added to a spreadsheet will cover up our data. Luckily, we'll discuss three tools that can turn your Excel data into picture elements, which can be manipulated and layered to really enhance your message.
Why Use Pictures?
Before we dive into How To ..., we need a discussion about why pictures are useful.
- Picture and drawing elements provide more formatting potential than you can achieve through cell formatting alone. With cell formatting, you're limited to whatever fits into the basic rectangular shape of cells.
- Picture elements are not constrained by the grid. If you've ever experienced the frustration of trying to consolidate several types of data and finding a format where everything looked neat and organized, you'll understand what I mean. Because row and column widths are fixed, every data element in the same row or column is constrained by the same settings. Picture elements allow you to ignore that and focus on the delivery of your message.
- Pictures can be resized. If you've ever tried to take a graph and resize it to fit within limited workbook space, then you'll understand that a simple resizing to 75% requires adjusting fonts, chart area, titles, etc. With a picture element, it's really as simple as resizing to 75%.
- In the case where you have a single data range or cell that is used repeatedly, a picture allows you to control data and formatting from a single point, instead of having to find all instances of your data set and manually change formats. This include the addition or deletion of rows and columns.
- You can rotate pictures. You can create a column chart and rotate it 90 degrees in either direction to make a bar chart, something that isn't always easy to do through the Chart Wizard.
What Excel picture tools will not do
I experimented with a couple of tricks and determined, or at least couldn't figure out as of this writing, that:
- Camera Objects and Paste Picture Link don't work with Word or Powerpoint, though you can use Paste Special: Paste Link: Picture or Bitmap.
- INDIRECT doesn't seem to work with Camera Objects
How To ...
Now I'll walk through the three tools. If you want to follow along, you can open the sample file, picture_tools.xls.
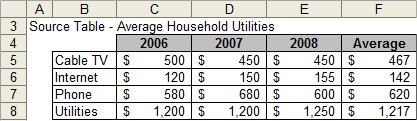
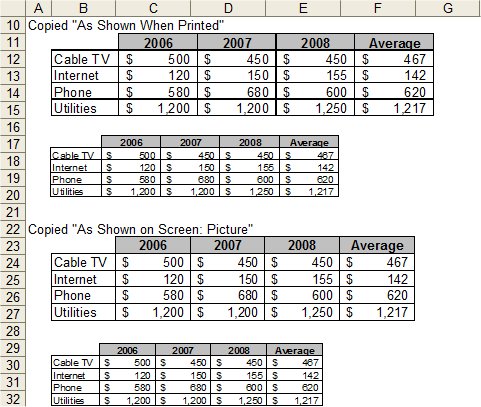
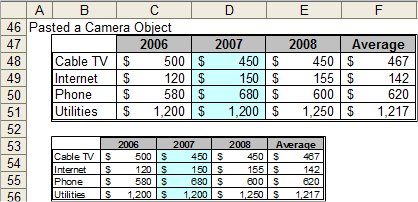
I'm going to start off with a fairly basic data table that I'm going to use as the basis for my examples. It's nothing special, just a table of household utilities over 3 years and a 3-year running average.
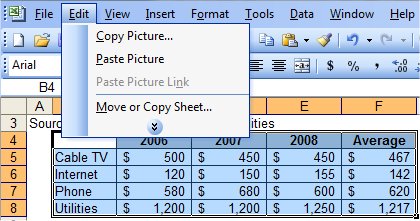
Copy Picture
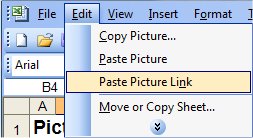
Copy Picture creates a STATIC graphic from an array of cells. Highlight your data, Copy, and then hold Shift and click on the Edit Menu. You'll see the option Copy Picture.
Next, you'll see a number of options.
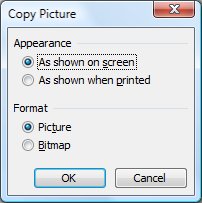
- As Shown when Printed
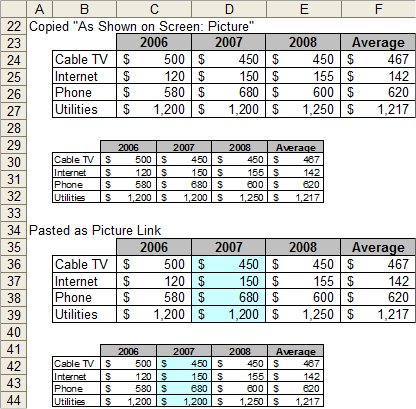
- As Shown on Screen: Picture
- As Shown on Screen: Bitmap
Here's a screenshot of my data set copied as a picture using both "As Shown when Printed" and "As Shown on Screen". I've shown the picture at both 100% and 75% size to give you and idea of what they look like when resized. Notice that the "As Shown when Printed" is actually a little larger than the "As Shown on Screen", which fits perfectly into the cells. Also notice that the 75% pictures are still pretty clear and don't constrained by cell borders at all. Lastly, "As Shown on Screen" is literal. If you have your grid is showing, the grid will show up in your picture.
Paste Picture Link
Paste Picture Link takes an array of cells and creates a DYNAMIC graphic. This means that as the target cells change (e.g., content, format, or size), the graphic will change with it. Highlight your data, Copy, hit Shift, click on the Edit menu, and then select Paste as Picture link.
Again, here's the result at both 100% and 75%. The Picture Link example has some blue shading, why? Because I shaded the corresponding cells in the source table. The Picture Link is dynamic, the "Copy as Shown ..." is not. This means that as the data or formatting in the linked area changes, the picture will change as well. This is starting to sound interesting, isn't it?
Open the sample file and try it out for yourself.
Camera Tool
To be honest, I'm still learning about the camera tool. It functions very much like a Paste Picture Link, BUT the resulting graphic has a cell reference, which leads to some very interesting possibilities, like traffic light charts.
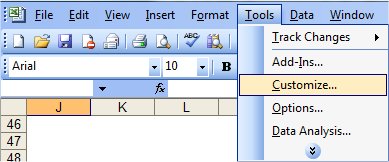
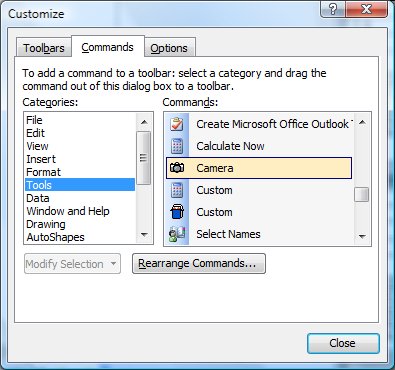
The first thing you need to do is to find where it resides and put it onto one of your toolbars. Go to the Main Menu: Tools, and the select Customize.
In the Commands tab, under the Tools category, you'll find the Camera tool. Drag the icon onto one of your toolbars.
Now, go back to your data set, highlight it, and click your Camera icon. Now, click on anywhere within the current worksheet, and you'll automatically paste a picture of your selected cells.
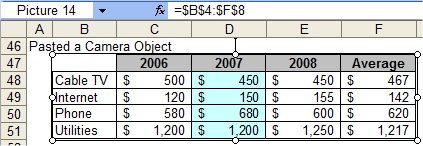
One way that the Camera object differs from a Linked Picture is that a camera object actually has a cell reference. Activate the camera object by clicking on it and you'll see a cell reference in the formula bar. This can be used for many interesting things, which we will discuss in a future tip.
Miscellaneous Items
- It seems that for both Paste Picture Link and the Camera, if you insert columns or rows, your picture will resize (e.g., size of picture gets bigger) if it's at 100% size. However, if the picture has been resized, the picture dimensions will stay the same, but the content inside will resize (e.g., font gets smaller) to accomodate the new data.
- Paste Picture Link and the Camera both work across multiple worksheets or workbooks.
Notes
| Last updated | 6/12/08 |
| Application Version | Excel 2003 |
| Author | Michael Kan |
| Pre-requisites |
Overview of Excel's Drawing Toolbar Fill Colors in the Office Suite |
| Related Tips |
Dynamically Linking Data from Excel Inserting Linked Data From Excel Into Word |